This step-by-step guide will show you how to connect your SQL database to QueryTree.
1. Once you have logged into your Microsoft Azure account, choose SQL Databases in the sidebar on the left side of the page. This shows you a list of all the SQL databases you have:
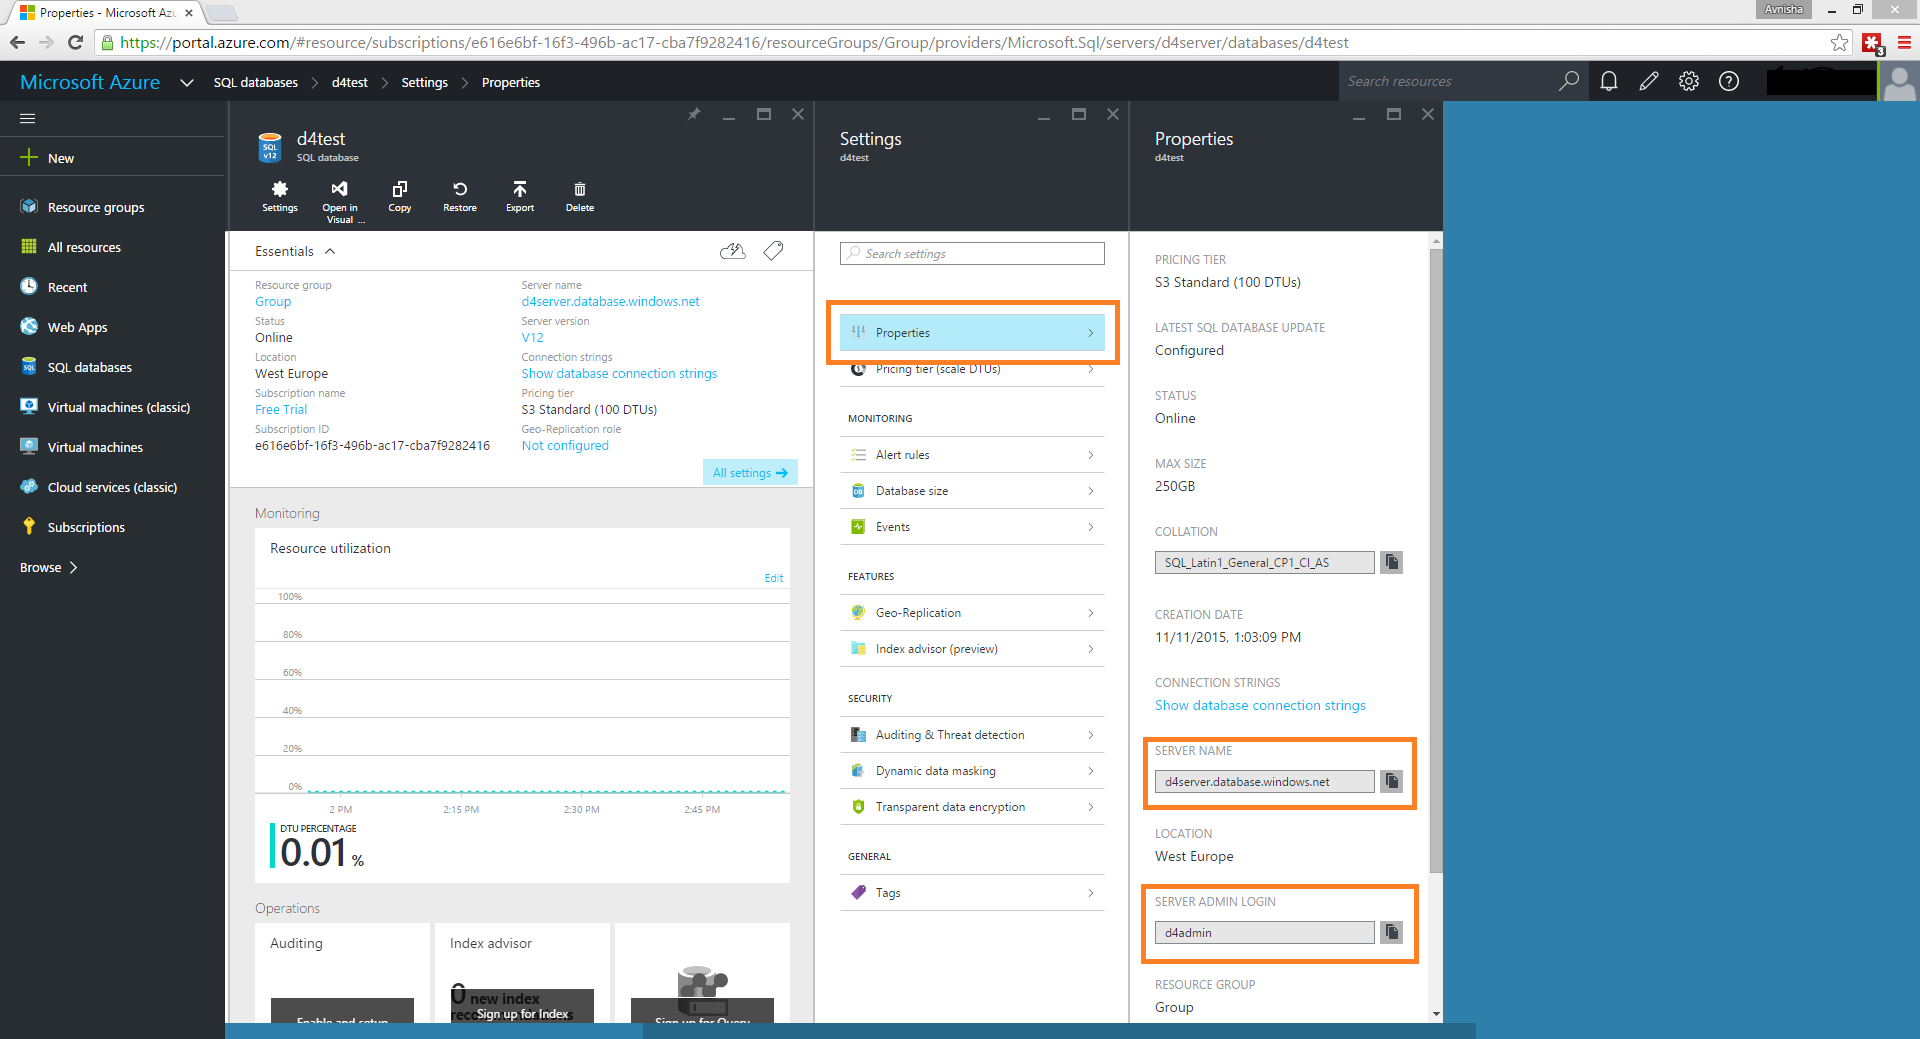
2. Once you have chosen your selected database, go to the Properties section:
The fields highlighted in the Properties window are the Server Name and Server Admin Login. Now we'll take a look at where these go in QueryTree.
3. You now need to log into your QueryTree account. On the My Database Connections page, click Create New:
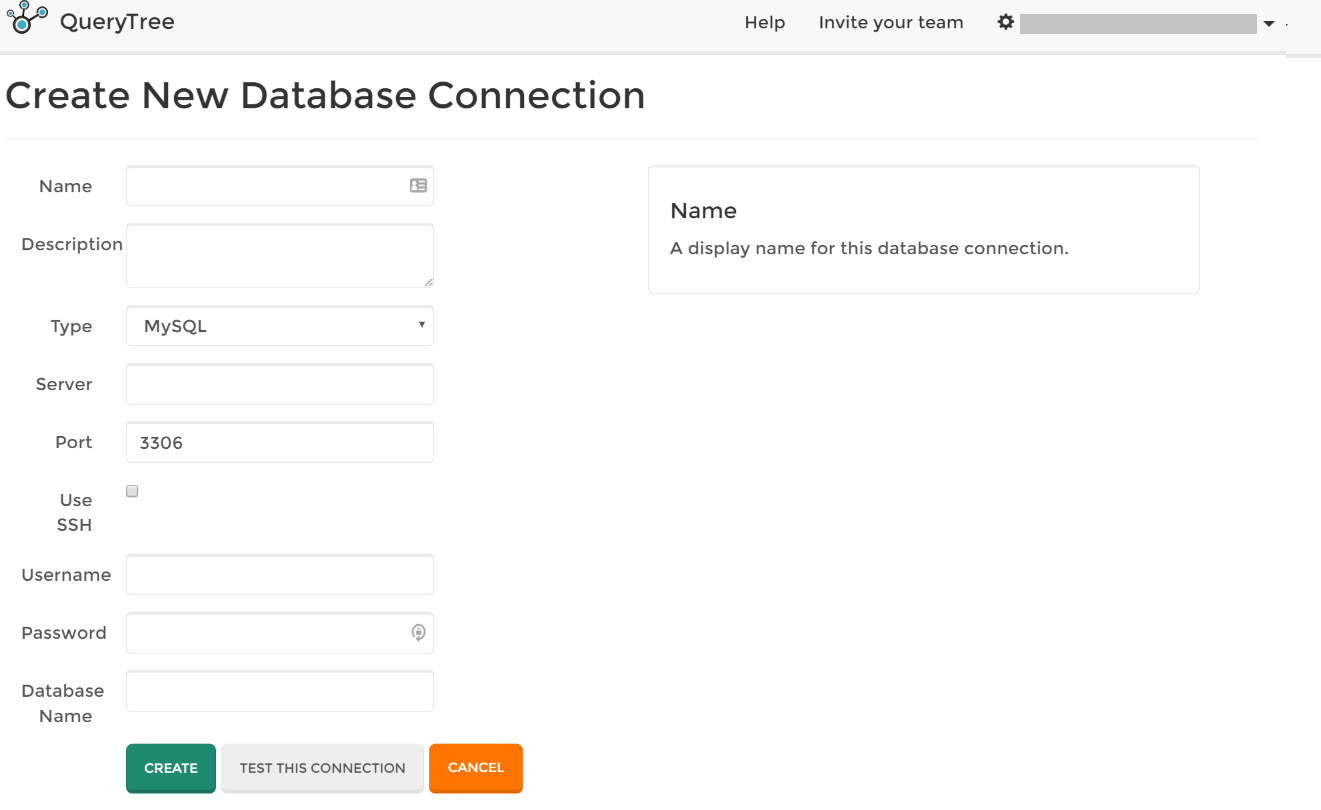
4. The Create New Database Connection page shows you all of the information required to create a new database connection. Enter a name for your connection and a description.

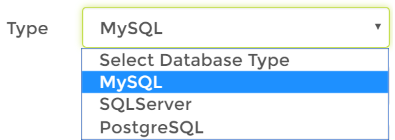
5. Select the Type of database from the dropdown menu:
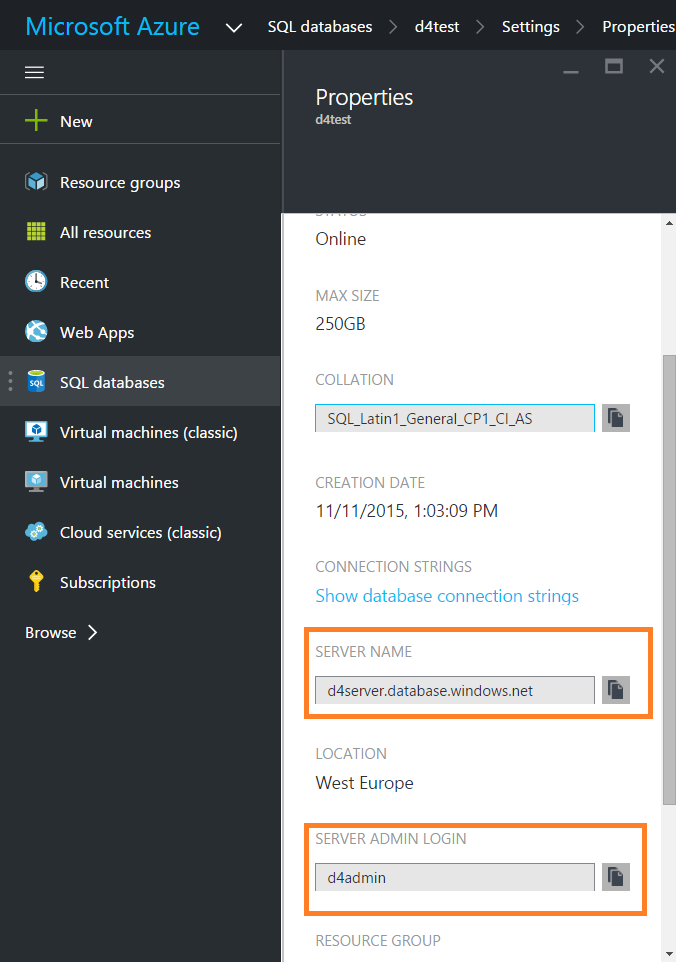
6. You then need to fill in the Server and Username fields. This information is taken directly from Azure and was shown earlier on in the guide. Just to remind you, it is in the Properties section:
Below you can see where the corresponding fields in QueryTree are:
Azure QueryTree
7. You then enter in your Password and the Database Name.
8. Once you have filled in all of the fields, feel free to hit the Test this Connection button. If the test is successful then you can go ahead and save your database connection.


